Thursday

My #BusinessPyjamas


While I'm not a professional blogger, I do work from home for over half the week, and I can bet other people in the same position will tell you that getting motivated to put on actual clothes in the morning can sometimes feel like a bit of a redundant task!

I've never been a morning person anyway, so if anyone actually does have the misfortune to see me before midday (usually the postman) I will probably still be in my pyjamas. And the tops and bottoms probably won't match. Who knows why both parts of the same pair are never clean at the same time, but I roll with it like some sort of deliberate bed-based fashion statement.

Post-midday, comfort is key for me as my real desk is where I store my make up so my desks come bed- and sofa-shaped, which means I need to be able to bend my legs (and that is barely possibly in so many of my skin tight jeggings or thigh skimming dresses). In this summer heat I tend to go for loose harem pants or thin patterned pyjama-style trousers and a strappy top, or if it's really hot as it has been over the past couple of weeks I'll throw on some little cotton shorts.
I bought a few casual summer dresses the other day which do the job of being both cheap enough to wear round the house without worrying but actually nice enough to wear out in the evening, and throwing one on keeps me cool in the heat but also makes me feel summery and a bit more 'done up' even when I still have bed head!

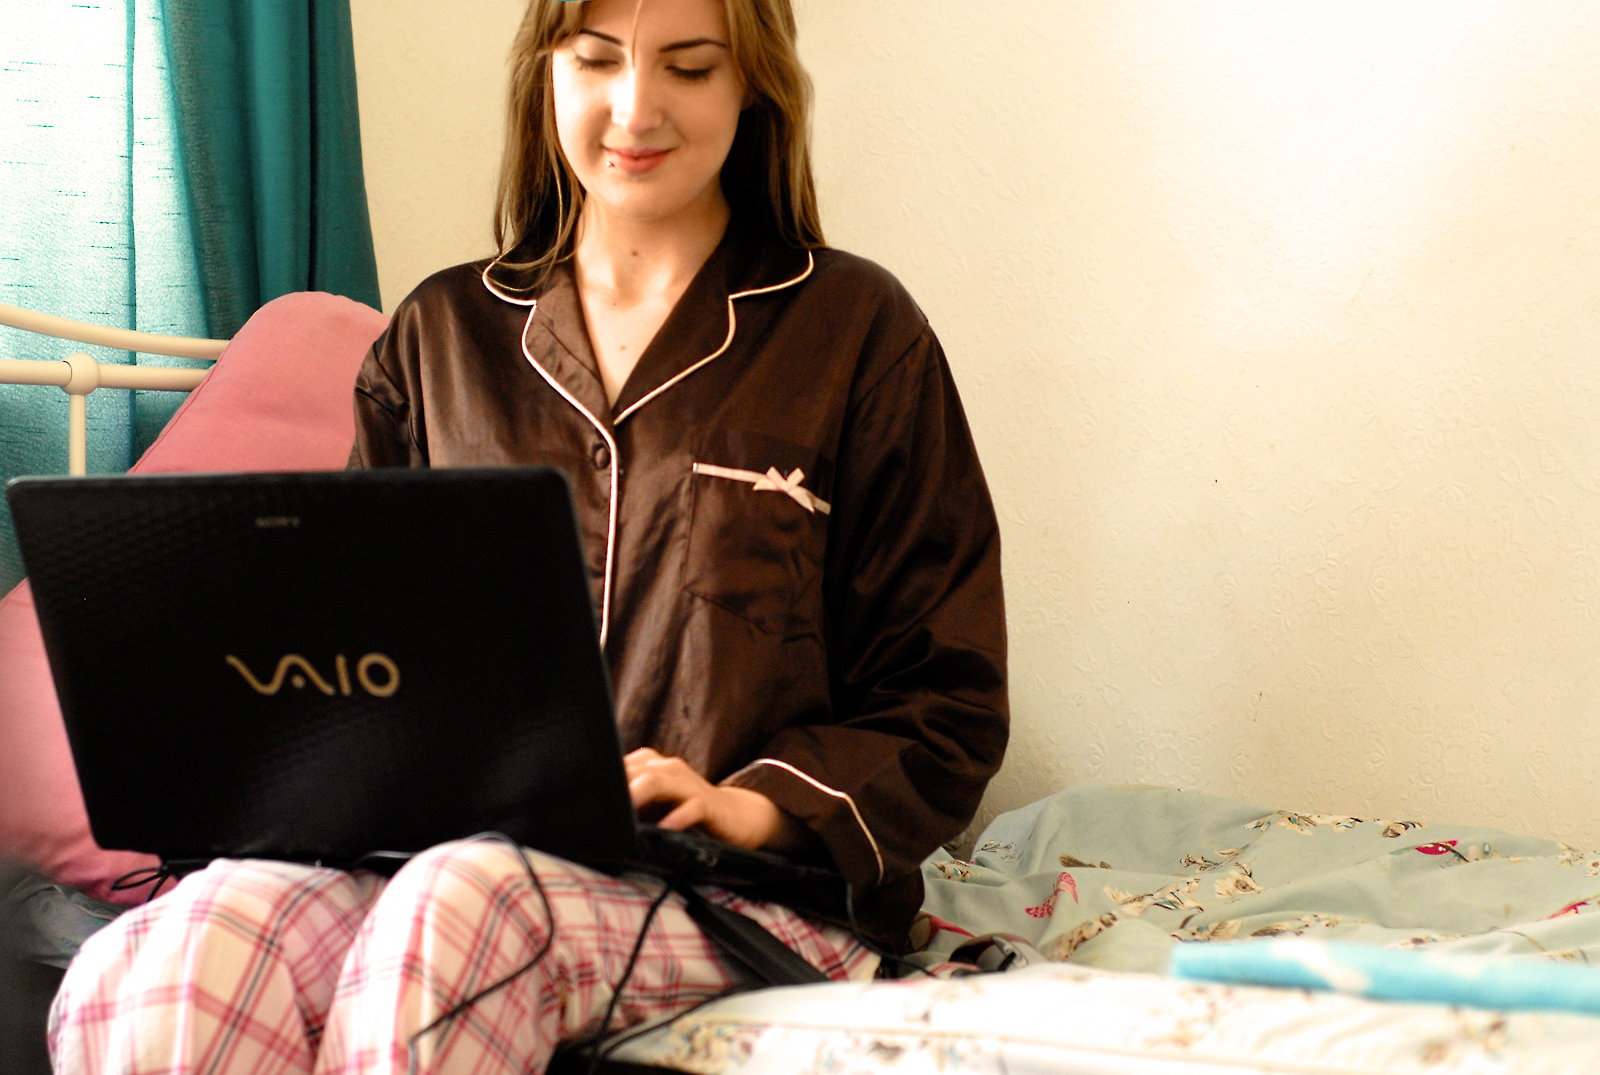
AXA want to see your Business Pyjamas for their current competition in which you could win an iPad mini- just snap a selfie of you at work in your most delightful pair and write a little blogpost about what you normally wear while working, then post your photo to the AXA Facebook page or tweet @AXABizTeam using the #BusinessPyjamas hashtag!


You can see my #BusinessPyjamas above, I nominate Sophie Rose Hearts to show us hers!


This is a sponsored post in association with AXA

Wednesday

How to Choose the Right Accessories for Your Face Shape

There are some accessories and beauty buys that can be used by pretty much anyone, as they don’t look any different from person to person. Examples of this include hair ties and pins, as well as certain shades of eyeliner and mascara, but of course there are many more that I haven’t mentioned.
On the other hand, there are products that will provide different looks depending on who is using them, meaning that there could be accessories that look better on you than someone else, as well as the other way around. It can sometimes feel a bit tricky trying to find the perfect accessory to suit your face shape, so I thought it might be helpful to share a few tips to help you on your way...


Picking Glasses & Sunglasses
Whether you need glasses to read or simply wear sunglasses for comfort and style, the whole process of choosing them can be a little bit overwhelming. There are so many frames to try on that it can be difficult knowing where to start.
As a starting point, it’s worth noting that Tesco Opticians can provide prescription glasses to suit your face shape - the staff are able to point out certain styles that could complement your features. If you can’t make it into a store, you can try out their ‘Frames on Me’ tool online that will let you try some frames on virtually instead!

Choosing Headbands
It might seem like a simple process going into a shop and picking up a couple of headbands that are on special offer, but it is worth considering how they will actually look and feel. We all know that are features are unique to us, so it is really the best solution to make the most of them.
When it comes to headbands, think whether it will look right proportionately, and how it will affect your hairline and the amount of forehead you have on show. Not only that but the size and weight of some styles (especially those with embellishments) might make them uncomfortable to wear after a couple of hours.

Selecting Hats
If you're one of the many people who have said the words, “hats don’t suit me”, it might be time to re-evaluate your thoughts! Whilst not all hats may suit you, there is likely to be one out there that will leave you feeling proud of your appearance. Like other accessories, they come in different shapes, colours and sizes, so it is just down to finding the winning combination for you.
Spend some time in a large department store trying on a number of different styles to narrow the options down, and then try and build up your confidence to wear one out. Hats are very “in” right now so it could be the perfect time!

I hope these tips will help you to own your accessories in the future, but I’d also love to hear your own tips and bits of advice for picking them. What do you find most difficult to buy for your face shape? Please leave me a comment and let me know!


This is a guest post


Monday

Blue Hair, Don't Care

Since Kylie Jenner posted her first blue ombre Instagram pic in May, and girls everywhere fawned over that picture of her and her sister at the Billboard Music Awards, blue has been on the agenda for hair trends everywhere. In June, Vanessa Hudgens dabbled in blue hair chalk, transforming her into a boho mermaid with flower crown and big turquoise ring, and this month Pixiwoo's Nicola Chapman has been sporting a bright blue dipdye, and make up artist Chrissspy donned an icy blue wig.

Blue hair has been spotted on celebs since 2011, with Kate Bosworth kicking off the trend, followed by Demi Lovato, Katy Perry, Alexa Chung, Rita Ora and even Cher Lloyd, in varying hues of dark blue and turquoise. 


Alexa Chung blue purple dip dye


Celebrities are still jumping on the blue bandwagon, but what do you think of the dip dyes and ombres? Is blue here to stay, or will another colour take its place? 

Sunday

Quick Tip: Best Way to Clean Cosmetic Sponges

A super quick post today as after a few years of cursing my beauty sponges when they got dirty, I've worked out the quickest and easiest way to clean them, and wanted to share it!
I'm a real stickler for getting my sponges scrupulously clean- I wash every last remnant of foundation/concealer from the surface and make sure the inside is as spotless as it can be too. Spending so long under the hot tap means it has taken about a year for any of my sponges to develop a stain, but it also means that I dread sponge-cleaning time as it takes so long. I asked for suggestions for a better method than just Baby Shampoo and antibacterial cleanser a while ago on twitter and I received all sorts of suggestions from showering with sponges to putting them in the washing machine, but nothing worked well enough for me.

I wrote about Surgical Spirit in my recent favourites post, and raved about how well it cleans and sanitises brushes and how cheap it is for a huge bottle (£3.56 for 500ml at my local chemist, or £1.35 for 200ml at Superdrug). I've been the loving the Beauty Blender since I received one in the July Birchbox but unfortunately I accidentally threw away the soap it came with and, looking for a way to keep my washing woes to a minimum, I turned to the Surgical Spirit to see what it could do. 

My new method is to place the sponge in an old or disposable plastic cup, then pour the Surgical Spirit over it until it swells, before giving it a few squeezes and pokes in the cup. It's amazing how dirty the liquid turns! As Surgical Spirit is mainly alcohol, it will kill any germs and bacteria lurking on and inside the sponge. 
After squishing the sponge in the cup for a bit, I pour away the Spirit and squeeze the sponge tightly in sink, it already looks considerable cleaner. I then move onto Baby Shampoo, and it takes two lots of shampooing and rinsing instead of the usual million to get the sponge completely stain-free, alcohol free, and back to its original clean state. I find the best way to lather it up is to rub the shampoo onto the outside of the sponge then roll it in between the palms of my hands instead of trying to scrub or squeeze the gel in. I then leave it in a little dish to air dry until I'm ready to use it. 

I usually find dye comes out of a new sponge for the first 5 or so washes, and the Spirit seems to really draw this extra dye out, which I find helpful as it can stain my sink during normal sponge washing. It does lightens the sponge's colour a little bit on the first wash so if colour is very important to you then this may not be the right method. However the alcohol doesn't change the texture or usage of the sponge at all and the shortened cleaning time outweighs a bit of colour change for me. 

If you're struggling to keep your sponges spotless and sanitised I would highly recommend getting yourself a bottle of Surgical Spirit, as it not only works brilliantly on sponges but it's also great for brushes too!


Remove a Stuck Ring With The Shimmy & Spin Method

There are many ways to remove a stuck ring, but forget what you've read on the internet about dental floss and elastic bands, this tried and true method will get that ring off easy peasy!
Whether you've tried on an old favourite that no longer fits, or your fingers have swelled in the summer heat (wishful thinking!), there's only three things you'll need- ice, lubrication and a bit of patience. 

First, soak the hand in a bowl of iced water for about 5 minutes, or as long as you can stand it. The coldness will reduce some of the swelling around the ring and slightly numb the finger, making the process quicker and easier.

After being iced, the finger needs lots of lubrication to reduce friction and allow the ring to slide on the skin. There are many things you can use- good old Vaseline is a solid option, cooking oil or olive oil will also work well, or in a pinch you can try a good squeeze of body moisturiser. 
Try to shimmy the ring on the finger so that the lubricant reaches underneath the band, this will move us on to the next step.

Once lubricated, the ring should move more easily on the finger. Unless you're working with a plain band, slowly spin the ring so that the top with any design or gems is now on the palm side. Shimmy the ring slowly from side to side and upwards until you reach the first finger joint. 

At this point push upwards on the ring from the palm side as you spin it round again, allowing the ring to slide sideways over the joint inside of pushing the skin toward the top of the finger and making it bunch. After this first joint, the rest of the finger should be easy and will just require a little more side to side shimmying until you reach the top. Ta da, your finger is free!

 Do you have any other sure fire methods to remove a stuck ring in a pinch?

[Remember that hospitals and jewellers have equipment to cut a ring off if you've tried everything and the ring is still stuck. If your finger is numb, a strange colour, or you have another injury causing your hand to swell, seek medical help and don't try to pull on the ring.]

Wednesday

Tips For Preventing Pain & Sensitivity From Crest Whitestrips

Crest Whitestrips receive a great deal of good reviews from the beauty community and are in my opinion one of the best affordable at home whitening treatments available. That said, in people with sensitive teeth, the whitening process can be a bit of a nightmare and bring quite a lot of pain along with bright shiny whiter teeth.

For me, the pain is almost always on the top 'chewing' part of the tooth, and feels like an electric shock right down into my nerve. I've had pain so strong, just for a few seconds, that it's made me gasp and need to sit down (the things we do for beauty eh!). The sensible advice would be to stop using the strips if the pain is too bad. But that said they really do work and I know some of you aren't in the habit of taking sensible advice! 
I've worked out some methods that in my case not only prevent the pain while whitening but also the extra sensitivity afterwards, so if they cause you pain but you're really determined to keep using them, then follow my tips below for 95% pain free whitening!

My first tip is to apply a toothpaste made for sensitive teeth before beginning. There are fancy toothpastes that can claim to numb the teeth but I find normal Sensodyne works fine. You can brush with it but I find it more effective to apply a big blob with my finger and spread the paste out into the teeth, leaving as long as possible before trying to swallow. 

If you get pain in the same place as me then the next tip is to avoid the top of the tooth completely and only whiten one side at a time instead of folding the strip over the teeth. This is done by cutting each strip in half lengthways and applying to only the front or back surface of the tooth at a time.


The final tip is to prevent any of the foam created from the strip coming into contact with the top of the teeth. Keeping your mouth open and swallowing carefully helps to some extent, but the foam seems to swell over and  get into the sensitive parts of the teeth. I've found the best way to prevent this is to bite down on a cotton pad while whitening.
This isn't too intrusive as you can still breathe and swallow normally but it really does help. For a 30 minute treatment you might need two or more cotton pads as they get a bit damp, and you need to make sure you place it far enough into your mouth to cover all the teeth being whitened, but this is the only way that I can wear even half a strip for the full 30 minutes of the 3D White treatment.

And there we go! This isn't rocket science stuff but you shouldn't feel much, if any, pain while using these methods, and all I get now is a mild tingling in my teeth. I've said, these strips really do work, otherwise I wouldn't keep using them. They're so much cheaper than getting a professional treatment, and even some of the over the counter treatments, so in my case it's no pain no gain as my teeth seem to stain quite easily.
Bear in mind the strips are not good for your tooth enamel, so I couldn't recommend using them regularly, but every now and then using them with the tips above will not only keep your teeth whiter but also prevent pain and sensitivity. 

© Taupe & Pearl: UK Affordable Beauty and Accessories Blog . All rights reserved.
Blogger templates by pipdig